CentOS Linux release 7.9.2009 编译安装最新版HAProxy 2.8 LTS长期支持版,并创建Shell监听脚本

编译安装HAProxy 2.8 LTS版本,官方源码包下载地址:http://www.haproxy.org/download/

由于CentOS7 之前版本自带的lua版本比较低并不符合HAProxy要求的lua最低版本(5.3)的要求,因此需要编译安装较新版本的lua环境,然后才能编译安装HAProxy。

1、查看现有的lua版本,如果版本太旧需要先更新lua

lua -v 
Lua 5.1.4  Copyright (C) 1994-2008 Lua.org, PUC-Rio

2、安装基础命令及编译依赖环境

yum install gcc readline-devel

3、下载和编译lua-5.4.6

cd /usr/local/src
wget --no-check-certificate https://www.lua.org/ftp/lua-5.4.6.tar.gz
tar xvf lua-5.4.6.tar.gz

开始编译

cd  lua-5.4.6
make linux test

查看编译安装的版本
src/lua -v
Lua 5.4.6  Copyright (C) 1994-2023 Lua.org, PUC-Rio

把旧版本移走,换成新的版本
mv /usr/bin/lua /usr/bin/lua.old
cp /usr/local/src/lua-5.4.6/src/lua /usr/bin/lua

确认现在的版本
lua -v 
Lua 5.4.6  Copyright (C) 1994-2023 Lua.org, PUC-Rio

4、安装Haproxy

创建用户
useradd -r -s /sbin/nologin haproxy

5、安装依赖

yum -y install gcc openssl-devel pcre-devel systemd-devel

6、下载和编译

wget --no-check-certificate  https://www.haproxy.org/download/2.8/src/haproxy-2.8.9.tar.gz
tar xvf haproxy-2.8.9.tar.gz
cd haproxy-2.8.9/


make TARGET=linux-glibc USE_OPENSSL=1 USE_PCRE=1 USE_SYSTEMD=1 USE_LUA=1 LUA_INC=/usr/local/src/lua-5.4.6/src LUA_LIB=/usr/local/src/lua-5.4.6/src
make install PREFIX=/etc/haproxy

创建软连接
ln -s /etc/haproxy/sbin/haproxy /usr/bin/haproxy
www.zhangfangzhou.cn
查看版本
haproxy -v
HAProxy version 2.8.9-1842fd0 2024/04/05 - https://haproxy.org/
Status: long-term supported branch - will stop receiving fixes around Q2 2028.
Known bugs: http://www.haproxy.org/bugs/bugs-2.8.9.html
Running on: Linux 3.10.0-1160.105.1.el7.x86_64 #1 SMP Thu Dec 7 15:39:45 UTC 2023 x86_64

7、创建配置文件

vi /etc/haproxy/haproxy.cfg
global
  maxconn 100000
  chroot /etc/haproxy
  stats socket /var/tmp/haproxy.sock mode 600 level admin
  user haproxy
  group haproxy
  daemon
  pidfile /var/tmp/haproxy.pid

defaults
  option http-keep-alive
  option forwardfor
  maxconn 100000
  mode http
  timeout connect 300000ms
  timeout client 300000ms
  timeout server 300000ms

listen stats
  mode http
  bind 0.0.0.0:3306
  stats enable
  log global
  stats uri /haproxy-status
  stats auth haadmin:Admin@2018..

listen db_port
  bind :3306
  mode tcp
  log global
  balance roundrobin
  option tcplog
  server db1 10.53.123.104:3306 check inter 3000 fall 2 rise 3
  server db2 10.53.123.105:3306 check inter 3000 fall 2 rise 3
  server db3 10.53.123.106:3306 check inter 3000 fall 2 rise 3


8、创建service服务

vi /usr/lib/systemd/system/haproxy.service
[Unit]
Description=HAProxy Load Balancer
After=syslog.target network.target

[Service]
ExecStartPre=/usr/bin/haproxy -f /etc/haproxy/haproxy.cfg -c -q
ExecStart=/usr/bin/haproxy -Ws -f /etc/haproxy/haproxy.cfg
ExecReload=/bin/kill -USR2 $MAINPID
LimitNOFILE=100000

[Install]
WantedBy=multi-user.target

systemctl enable haproxy
systemctl start haproxy
9、设置监听脚本

vi ha_watchdog.sh
#!/bin/bash
#www.zhangfangzhou.cn
# 定义日志文件路径
LOG_FILE="/var/log/haproxy_watchdog.log"

# 定义 HAProxy 进程的名称
HAPROXY_PROCESS="haproxy"

# 检查 HAProxy 进程是否在运行
check_haproxy_process() {
    # 使用 pgrep 命令检查是否存在名为 haproxy 的进程
    pgrep -x $HAPROXY_PROCESS > /dev/null
}

# 启动 HAProxy 进程
start_haproxy() {
    echo "$(date +'%Y-%m-%d %H:%M:%S') - Starting HAProxy..." >> $LOG_FILE
    systemctl start haproxy
}

# 主循环
while true; do
    # 检查 HAProxy 进程是否在运行
    if ! check_haproxy_process; then
        # 如果进程不存在,则重新启动 HAProxy 并记录日志
        start_haproxy
    fi
    # 休眠一段时间后再次检查
    sleep 60
done


#设置开机启动
chmod +x ha_watchdog.sh

vi /etc/rc.local
nohup /root/ha_watchdog.sh &

备份软件之Veeam Backup Replication

备份软件之Veeam Backup Replication
一、为什么要做备份
1、数据对于个人用户和企业来说都是非常宝贵的资产。这些软件提供了可靠的备份机制,可以保护数据免受硬件故障、意外删除、恶意软件和其他灾难性事件的影响。通过定期备份数据,用户可以确保其数据的完整性和可用性。
2、当发生数据丢失、系统崩溃或其他灾难性事件时,可以帮助用户快速恢复数据和系统。这对于保证业务连续性至关重要,尤其对于依赖于数据和系统的企业来说。备份软件提供了灵活的恢复选项,可以按需恢复整个系统、单个文件或文件夹,以满足不同恢复需求。

二、常见的备份软件有哪些
1、安克诺斯
2、Veeam
3、云琪
4、NetBackup & Veritas Backup Exec
5、Zerto

三、Veeam Backup Replication 下载安装
1、Veeam Backup Replication 官方网站ISO文件 点击下载Veeam Backup Replication 12.1.0.2131_20231206
安装要求(推荐)
操作系统推荐 Windows Server 2016-2022
CPU要求至少四个内核、内存建议4GB以上。
存储空间建议100GB以上,备份用空间根据需求来算。
数据库可使用自带的PostgreSQL 15.1 或安装 SQL Server 2012-2022进行使用。
目前支持VMware vSphere 6.0-8.0U2版本

四、Veeam Backup Replication安装

五、激活Veeam Backup Replication(VBR)软件为专业版
替换文件下载
1、替换文件下载1
2、替换文件下载2

VeeamLicense.dll
#替换文件

Veeam_ASv11_1500.lic
Veeam_BackupRep_v12_5000_1.lic
#授权文件

六、停止服务和替换文件
安装完软件之后使用管理员运行PowerShell 执行下面命令:

get-service -displayname Veeam* | stop-service
get-service -displayname Veeam*

七、启动服务

get-service -displayname Veeam* | start-service

八、导入授权

打开Veeam Backup & Replication Console 软件,点击左上角的菜单,选择License选项,
点击install,选择Veeam_BackupRep_v12_5000_1.lic 文件导入安装即可激活。

参考来源
https://www.digiboy.ir/12153/veeam-backup-replication-12-1-0-2131/

本地部署 AI绘图作画工具 stable-diffusion-webui(含多种模型和国内加速)

本地部署 AI绘图作画工具 stable-diffusion-webui(含多种模型和国内加速)
Stable-Diffusion-WebUI是一个基于Gradio库的浏览器界面,用于可视化展示和交互式探索Stable Diffusion模型的结果。
GPU显存大小:GPU显存大小限制了模型可以处理的数据量。较大的显存可以容纳更多的图像信息和模型参数,因此可以支持生成更大尺寸的图片。当生成大尺寸图片时,需要更多的显存来存储中间结果和生成的图像,较小的显存可能会限制生成高分辨率或复杂场景的能力。
GPU主频:GPU主频指的是GPU的工作频率,即每秒处理的指令数。较高的主频能够提供更快的计算速度,从而加快AI生成图片的过程。当需要迅速生成图片时,高主频的GPU可以有效缩短生成时间,提高效率。
显存位宽:显存位宽表示显存每次传输数据的宽度,通常以位为单位。较大的位宽意味着GPU可以更快地读取和写入显存数据。在生成图片过程中,大的位宽可以提高数据传输速度,从而加快模型的训练和推理速度。

部署环境
CPU:Intel(R) Xeon(R) Gold 6246 CPU @ 3.30GHz 3.30 GHz
GPU:NVIDIA GRID V100S-32Q(vGPU)
内存:64GB
磁盘:1TB
OS: Microsoft Windows 10 企业版

部署步骤
1、#安装基础环境
基础环境由Python 3.10.6(安装 Python 3.10.6 与 pip,一定安装3.10.6版本的Python),Git ,CUDA 组成
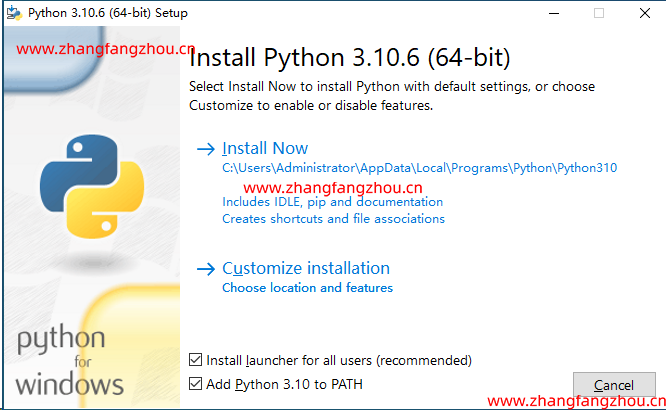
1.1、#安装Python

访问 Python3.10.6 下载页面 https://www.python.org/downloads/release/python-3106/

找到【Windows installer (64-bit)】点击下载,安装的时候需要勾选 Add Python to PATH。

安装完成后
命令行里输入Python --version,如果返回Python 3.10.6那就是安装成功。
命令行里输入 python -m pip install --upgrade pip安装升级pip到最新版。

1.2、#安装 Git https://git-scm.com/download
访问 Git 下载页面
点击【Download for Windows】,【64-bit Git for Windows Setup】点击下载
命令行运行git --version

1.3、#安装 CUDA (NVIDIA显卡用户)
命令行运行nvidia-smi,看下自己显卡支持的 CUDA版本

C:\Users\Administrator>cd C:\Program Files\NVIDIA Corporation\NVSMI

C:\Program Files\NVIDIA Corporation\NVSMI>nvidia-smi.exe
Thu Aug 17 15:06:21 2023
+-----------------------------------------------------------------------------+
| NVIDIA-SMI 474.14       Driver Version: 474.14       CUDA Version: 11.4     |
|-------------------------------+----------------------+----------------------+
| GPU  Name            TCC/WDDM | Bus-Id        Disp.A | Volatile Uncorr. ECC |
| Fan  Temp  Perf  Pwr:Usage/Cap|         Memory-Usage | GPU-Util  Compute M. |
|                               |                      |               MIG M. |
|===============================+======================+======================|
|   0  GRID V100S-32Q     WDDM  | 00000000:02:01.0  On |                    0 |
| N/A    0C    P0    N/A /  N/A |   6305MiB / 32768MiB |      0%      Default |
|                               |                      |                  N/A |
+-------------------------------+----------------------+----------------------+

+-----------------------------------------------------------------------------+
| Processes:                                                                  |
|  GPU   GI   CI        PID   Type   Process name                  GPU Memory |
|        ID   ID                                                   Usage      |
|=============================================================================|
|    0   N/A  N/A      1520    C+G   Insufficient Permissions        N/A      |
|    0   N/A  N/A      1540    C+G   Insufficient Permissions        N/A      |
|    0   N/A  N/A      1548    C+G   Insufficient Permissions        N/A      |
|    0   N/A  N/A      2468      C   ...thon\Python310\python.exe    N/A      |


接下来前往英伟达官网,下载对应版本https://developer.nvidia.com/cuda-toolkit-archive
选你自己的操作系统版本,注意下离线安装包【exe [local]】,在线安装的话,速度还是比较慢。

1.4、#为什么NVIDIA显卡安装驱动后,还要安装CUDA驱动
NVIDIA显卡驱动和CUDA是两个不同的软件组件,它们在GPU的功能和应用上发挥不同的作用。

NVIDIA显卡驱动:NVIDIA显卡驱动是操作系统与显卡之间的桥梁,它负责管理和控制显卡的硬件功能,确保显卡能够正常工作并与操作系统进行通信。
安装显卡驱动是使用NVIDIA显卡的基本要求,它提供了对显卡的支持和兼容性。

CUDA(Compute Unified Device Architecture):CUDA是NVIDIA开发的并行计算平台和编程模型,它允许开发者使用显卡的并行计算能力进行高性能计算和加速。
CUDA提供了一组API和工具,使开发者能够在显卡上编写并行计算的程序,并利用GPU的大规模并行计算能力加速各种计算任务,包括机器学习、深度学习、科学计算等。

2、#下载项目源代码

git clone https://github.com/AUTOMATIC1111/stable-diffusion-webui.git

D:\>git clone https://github.com/AUTOMATIC1111/stable-diffusion-webui.git
Cloning into 'stable-diffusion-webui'...
remote: Enumerating objects: 25982, done.
remote: Counting objects: 100% (369/369), done.
remote: Compressing objects: 100% (160/160), done.
remote: Total 25982 (delta 237), reused 323 (delta 205), pack-reused 25613
Receiving objects: 100% (25982/25982), 31.77 MiB | 12.31 MiB/s, done.
Resolving deltas: 100% (18197/18197), done.
# 切换到项目根目录
cd stable-diffusion-webui

3、#下载模型文件
stable-diffusion-webui只是个工具,需要后端的训练模型来让AI参考建模。

目前比较主流的模型有
Stable-Diffusion (SD) 模型:Stable-Diffusion 是一个基于扩散模型的图像生成模型,主要用于生成偏向真实人物的图像。它采用了稳定扩散过程的方法,通过迭代多次来逐步生成图像,并且具有较好的生成稳定性和细节保留能力。SD 模型通常用于生成逼真的人脸图像或人物形象。
Waifu-Diffusion (WD) 模型:Waifu-Diffusion 是一个专注于生成二次元角色(常称为"waifu")图像的模型。它基于扩散模型的思想,通过迭代生成过程逐渐生成具有艺术风格的二次元角色图像。WD 模型通常用于创作二次元角色形象、插画或动漫风格的图像。
Novel-AI-Leaks (Naifu) 模型:Novel-AI-Leaks 是一个更偏向于二次元角色的图像生成模型。它在生成图像时,更加注重创造出富有想象力和创意的二次元角色形象。Naifu 模型通常用于艺术创作、插画制作和二次元角色设计等领域。

4、#运行
双击运行\stable-diffusion-webui\webui-user.bat
脚本会自己检查依赖,会下载大约几个GB的东西,解压安装到文件夹内(中间可能会失败,失败后需要再次运行webui-user.bat)。


venv "D:\stable-diffusion-webui\venv\Scripts\Python.exe"
Python 3.10.6 (tags/v3.10.6:9c7b4bd, Aug 1 2022, 21:53:49) [MSC v.1932 64 bit (AMD64)]
Version: v1.5.1
Commit hash: 68f336bd994bed5442ad95bad6b6ad5564a5409a
Installing gfpgan

当遇到卡在installing gfpgan时候需要切换成阿里的源

C:\Users\Administrator>pip config set global.index-url https://mirrors.aliyun.com/pypi/simple
Writing to C:\Users\Administrator\AppData\Roaming\pip\pip.ini

5、#复制到浏览器访问
(默认是 http://127.0.0.1:7860 )(注意不要关闭这个窗口,关闭就退出了)

6、#生成第一张AI作图

1、Prompt(提示):在Prompt中填写你想要的特征点,可以作为生成图片的指导。通过提供具体的描述或指令,可以引导AI生成符合你期望的图像。

2、Negative prompt(负面提示):在Negative prompt中填写你不想要的特征点,可以告诉AI避免生成这些特征。负面提示可以帮助你更精确地控制生成图片的内容。

3、Sampling Steps(采样步数):指定AI推演的步数,控制生成图片的细节和精度。较高的步数可以产生更多的细节,但会增加生成时间。一般在20到30之间选择较为合适。

4、Sampling method(采样方法):选择AI推演的算法,常见的有Euler a、Euler和DDIM等。不同的采样方法可能会影响到生成图片的效果和风格。

5、图片分辨率:指定生成图片的分辨率,较高的分辨率可以获得更清晰、更多细节的图像。但需要注意显存的限制,确保分辨率不超过显存能够处理的范围。

扩展选项:
Restore faces(修复人脸):勾选后可以生成更真实的脸部特征。需要下载额外的运行库,并且第一次使用时会占用一定的存储空间。

D:\stable-diffusion-webui\models\Codeformer\codeformer-v0.1.0.pth
D:\stable-diffusion-webui\repositories\CodeFormer\weights\facelib\detection_Resnet50_Final.pth
D:\stable-diffusion-webui\repositories\CodeFormer\weights\facelib\ parsing_parsenet.pth

Tiling(平铺):让生成的图像可以无缝地平铺,类似瓷砖的效果,使图案可以自动衔接。
Highres. fix(超分辨率修复):使用更高的分辨率填充内容,但最终生成的图像仍然是设定的分辨率。
Batch count(批次数):指定一次运行生成图片的次数。
Batch size(批次大小):指定同时生成图片的数量。
CFG Scale(CFG比例):控制AI生成图片时参考你的Prompt和Negative prompt的程度。较高的值会更严格地按照你的设定进行生成,而较低的值则更加自由和创意。
Seed(随机数种子):用于初始化AI生成图片的起始噪声,不同的种子会产生不同的生成结果。
Generate(生成):点击该按钮开始运行AI生成图片的过程。
Stable Diffusion checkpoint(稳定扩散检查点):选择使用的模型,根据你的需求和体验自行选择。

Script X/Y/Z plot
1、使用多种绘画方式
Y type 选择Sampler,然后在Y values 可以全部选择Sampling method,经测试这几种方式效果较好

Euler a
DPM++2S a
DPM++2M
DPM2 a Karras
DPM2++ 2S a Karras
DPM2++ 2M a Karras

2、测试lora权重对绘画的影响
在txt2img填写,在Y type选择Prompt S/R,然后在Y values 填写STRENGTH,0.1,0.2,0.3,0.4,0.5,0.6,0.7,0.8,0.9,1

7、模型下载
majicMIX realistic 麦橘写实 https://www.liblibai.com/modelinfo/bced6d7ec1460ac7b923fc5bc95c4540
采样器建议: Euler
如果要修复脸部,请使用after detailer.

Pure Beauty https://www.liblibai.com/modelinfo/13bcec1633cd440c9ae986787b733b10
CFG Scale:7
迭代步数:15-120
VAE: 840000
采样器建议: DPM++ 2M SDE Karras
绘制人物图像时请配合启用ADetailer 插件,推荐使用模型:face_yolov8n.pt和face_yolov8s.pt
生成专业摄影图像时,建议在正向提示词中除了Bean_Lab, Pure Beauty, 1 girl, best quality等触发词外,可加入以下词汇:Studio lighting, Canon EOS-1D X Mark II, 70mm ,f2.8,ISO 200,(其中除了工作室灯光外,方位灯光也可以根据需要来选择使用,例如:顺光、前侧光、侧光、顶光、侧逆光等等,相机型号有多种选择,除了上述提到的,还有Canon EOS R5、Canon 1Dx3、SONY A7R III、Nikon D6、 Fujifilm GFX 100S、Fujifilm 50S II等等高清相机型号可选择, 另外推荐使用大光圈F1.4,F2.0,F2.8,人像焦距24-70mm, 感光度:100-200之间),当然,上述仅供参考,这些数据都可根据最终想要呈现的效果来调试
Negative Promts / 负面提示词:ng_deepnegative_v1_75t,EasyNegative

8、提示词下载
a、https://github.com/thisjam/sd-webui-oldsix-prompt
点击页面上的code->DownloadZip 解压以后放在你的sd文件夹下的extensions文件夹后应用并重启

11、在页面上显示 VAE 设置
stable-diffusion-webui 默认页面并没有显示 VAE 设置部分,所以需要先设置一下。首先点击「Settings」,然后点左侧菜单的「User interface」这个 Tab,
拉到下面有个选项叫做Quicksettings list,在输入框里面添加,sd_vae,CLIP_stop_at_last_layers,最后点击上面的「Apply settings」,在点「Reload UI」就会重新刷新页面。
Clip skip选项,默认是 1,需要改成常用的 2,可以简单的理解这个值越高,AI 就会省略越多的分类细项。

下载 VAE 模型(效果不理想)
https://huggingface.co/stabilityai/sd-vae-ft-mse-original/tree/main

12、ADetailer 插件
1、https://github.com/Bing-su/adetailer
2、解压上传到文件夹D:\stable-diffusion-webui\extensions
3、重启Web-UI
4、固定Seed
5、启用ADetailer
Enable ADetailer #启用

1st #第一个ADetailer model模型
mediapipe_face_mesh

2nd #第二个ADetailer model模型

模型说明
Model Target
face_yolov8n.pt 2D / realistic face
face_yolov8s.pt 2D / realistic face
hand_yolov8n.pt 2D / realistic hand
person_yolov8n-seg.pt 2D / realistic person
person_yolov8s-seg.pt 2D / realistic person
mediapipe_face_full realistic face
mediapipe_face_short realistic face
mediapipe_face_mesh realistic face

自建 免费 NVIDIA vGPU15 License Server 授权服务器

自建 免费 NVIDIA vGPU15 License Server 授权服务器,vGPU的虚拟机运行会定时向License服务器发起License请求。
1、CentOS 7 安装docker服务
2、创建配置和生成容器
3、Linux 客户端激活
4、Windows 客户端激活

1、CentOS 7 安装docker服务
#安装依赖

sudo yum install -y yum-utils device-mapper-persistent-data lvm2

#添加Docker源

sudo yum-config-manager --add-repo https://download.docker.com/linux/centos/docker-ce.repo

#安装Docker

sudo yum install -y docker-ce docker-ce-cli containerd.io

#国内建议修改配置 Docker 镜像加速器

cat > /etc/docker/daemon.json << EOF
{
  "dns": ["114.114.114.114", "180.76.76.76"],
  "registry-mirrors": ["https://docker.mirrors.ustc.edu.cn"],
  "bip": "192.168.199.1/24",
   "debug": true,
   "log-level": "info",
   "live-restore": true
}
EOF

#启动Docker

sudo systemctl start docker

#设置开机启动

sudo systemctl enable docker

# 拉取最新镜像

docker pull collinwebdesigns/fastapi-dls:latest

# 保存镜像,以备不时之需

docker save -o collinwebdesigns_fastapi-dls.tar collinwebdesigns/fastapi-dls:latest

2、创建配置和生成容器
# 创建目录

mkdir -p /opt/docker/fastapi-dls/cert
cd /opt/docker/fastapi-dls/cert

# 生成公私钥

openssl genrsa -out /opt/docker/fastapi-dls/cert/instance.private.pem 4096
openssl rsa -in /opt/docker/fastapi-dls/cert/instance.private.pem -outform PEM -pubout -out /opt/docker/fastapi-dls/cert/instance.public.pem

# 为 Web 服务器生成 SSL 证书

openssl req -x509 -nodes -days 3650 -newkey rsa:4096 -keyout /opt/docker/fastapi-dls/cert/webserver.key -out /opt/docker/fastapi-dls/cert/webserver.crt

输入属下信息

Country Name (2 letter code) [XX]:CN
State or Province Name (full name) []:HN
Locality Name (eg, city) [Default City]:ZZ
Organization Name (eg, company) [Default Company Ltd]:zhangfangzhou
Organizational Unit Name (eg, section) []:zhangfangzhou
Common Name (eg, your name or your server's hostname) []:zhangfangzhou
Email Address []:admin@zhangfangzhou.cn

原创文章 https://www.zhangfangzhou.cn/free-nvidia-vgpu15-license-server.html

# 配置创建容器 `hostname -i` 换成自己的 IP 即可

docker volume create zhangfangzhou-dls-db
docker run -itd --restart=always -e LEASE_EXPIRE_DAYS=1825 -e DLS_URL=`hostname -i` -e DLS_PORT=8443 -p 8443:443 -v /opt/docker/fastapi-dls/cert:/app/cert -v zhangfangzhou-dls-db:/app/database collinwebdesigns/fastapi-dls:latest

#例如

docker run -itd --restart=always -e LEASE_EXPIRE_DAYS=1825 -e DLS_URL=10.0.0.7 -e DLS_PORT=8443 -p 8443:443 -v /opt/docker/fastapi-dls/cert:/app/cert -v zhangfangzhou-dls-db:/app/database collinwebdesigns/fastapi-dls:latest

3、Linux 客户端激活

wget --no-check-certificate -O /etc/nvidia/ClientConfigToken/client_configuration_token_$(date '+%d-%m-%Y-%H-%M-%S').tok https://10.0.0.7:8443/-/client-token

#接着重启 nvidia-gridd service 服务:

service nvidia-gridd restart

#也可以使用命令行查看授权细节:

nvidia-smi -q |findstr Lincese

4、Windows 客户端激活
使用管理员权限运行 Powershell,

C:\Program Files\NVIDIA Corporation\vGPU Licensing\ClientConfigToken
curl.exe --insecure -L -X GET https://10.0.0.7:8443/-/client-token -o "C:\Program Files\NVIDIA Corporation\vGPU Licensing\ClientConfigToken\client_configuration_token_$($(Get-Date).tostring('dd-MM-yy-hh-mm-ss')).tok"

Restart-Service NVDisplay.ContainerLocalSystem

容器接口
下表只列出了主要的接口,更详细的接口可以参考 /-/docs 和 /-/redoc 的 PATH 接口文档。

请求方法 PATH 解释说明
GTE / 重定向到 /-/readme
GTE /-/health 用于运行状况检查,还显示当前版本和提交哈希。
GTE /-/readme HTML 页面展示 README.md
GTE /-/docs GET /-/openapi.json 展示 Swagger UI 页面的接口文档
GTE /-/redoc GET /-/openapi.json 展示 ReDoc 页面的接口文档
GTE /-/manage 显示用于删除源或租约的非常基本的 UI
GTE /-/origins?leases=false 列出注册的原产地,origin 参数指的是包括每个租约的引用源
DELETE /-/origins 删除所有源及其租约
GTE /-/leases?origin=false 列出当前租约,origin 参数指的是包括每个租约的引用源
DELETE /-/lease/{lease_ref} 删除租约
GTE /client-token 生成客户端令牌

正则表达式手册

到底什么是正则表达式?

在编写处理字符串的程序或网页时,经常有查找符合某些复杂规则的字符串的需要。正则表达式就是用于描述这些规则的工具。换句话说,正则表达式就是记录文本规则的代码。

常用元字符

代码 说明
. 匹配除换行符以外的任意字符
w 匹配字母或数字或下划线
s 匹配任意的空白符
d 匹配数字
b 匹配单词的开始或结束
^ 匹配字符串的开始
$ 匹配字符串的结束

常用限定符

代码/语法 说明
* 重复零次或更多次
+ 重复一次或更多次
? 重复零次或一次
{n} 重复n次
{n,} 重复n次或更多次
{n,m} 重复n到m次

常用反义词

代码/语法 说明
W 匹配任意不是字母,数字,下划线,汉字的字符
S 匹配任意不是空白符的字符
D 匹配任意非数字的字符
B 匹配不是单词开头或结束的位置
匹配除了x以外的任意字符
匹配除了aeiou这几个字母以外的任意字符

表达式全集

字符 描述
\ 将下一个字符标记为一个特殊字符、或一个原义字符、或一个向后引用、或一个八进制转义符。例如,“n”匹配字符“n”。“\n”匹配一个换行符。串行“\\”匹配“\”而“\(”则匹配“(”。
^ 匹配输入字符串的开始位置。如果设置了RegExp对象的Multiline属性,^也匹配“\n”或“\r”之后的位置。
$ 匹配输入字符串的结束位置。如果设置了RegExp对象的Multiline属性,$也匹配“\n”或“\r”之前的位置。
* 匹配前面的子表达式零次或多次。例如,zo*能匹配“z”以及“zoo”。*等价于{0,}。
+ 匹配前面的子表达式一次或多次。例如,“zo+”能匹配“zo”以及“zoo”,但不能匹配“z”。+等价于{1,}。
? 匹配前面的子表达式零次或一次。例如,“do(es)?”可以匹配“does”或“does”中的“do”。?等价于{0,1}。
{n} n是一个非负整数。匹配确定的n次。例如,“o{2}”不能匹配“Bob”中的“o”,但是能匹配“food”中的两个o。
{n,} n是一个非负整数。至少匹配n次。例如,“o{2,}”不能匹配“Bob”中的“o”,但能匹配“foooood”中的所有o。“o{1,}”等价于“o+”。“o{0,}”则等价于“o*”。
{n,m} mn均为非负整数,其中n<=m。最少匹配n次且最多匹配m次。例如,“o{1,3}”将匹配“fooooood”中的前三个o。“o{0,1}”等价于“o?”。请注意在逗号和两个数之间不能有空格。
? 当该字符紧跟在任何一个其他限制符(*,+,?,{n},{n,},{n,m})后面时,匹配模式是非贪婪的。非贪婪模式尽可能少的匹配所搜索的字符串,而默认的贪婪模式则尽可能多的匹配所搜索的字符串。例如,对于字符串“oooo”,“o+?”将匹配单个“o”,而“o+”将匹配所有“o”。
. 匹配除“\n”之外的任何单个字符。要匹配包括“\n”在内的任何字符,请使用像“(.|\n)”的模式。
(pattern) 匹配pattern并获取这一匹配。所获取的匹配可以从产生的Matches集合得到,在VBScript中使用SubMatches集合,在JScript中则使用$0…$9属性。要匹配圆括号字符,请使用“\(”或“\)”。
(?:pattern) 匹配pattern但不获取匹配结果,也就是说这是一个非获取匹配,不进行存储供以后使用。这在使用或字符“(|)”来组合一个模式的各个部分是很有用。例如“industr(?:y|ies)”就是一个比“industry|industries”更简略的表达式。
(?=pattern) 正向肯定预查,在任何匹配pattern的字符串开始处匹配查找字符串。这是一个非获取匹配,也就是说,该匹配不需要获取供以后使用。例如,“Windows(?=95|98|NT|2000)”能匹配“Windows2000”中的“Windows”,但不能匹配“Windows3.1”中的“Windows”。预查不消耗字符,也就是说,在一个匹配发生后,在最后一次匹配之后立即开始下一次匹配的搜索,而不是从包含预查的字符之后开始。
(?!pattern) 正向否定预查,在任何不匹配pattern的字符串开始处匹配查找字符串。这是一个非获取匹配,也就是说,该匹配不需要获取供以后使用。例如“Windows(?!95|98|NT|2000)”能匹配“Windows3.1”中的“Windows”,但不能匹配“Windows2000”中的“Windows”。预查不消耗字符,也就是说,在一个匹配发生后,在最后一次匹配之后立即开始下一次匹配的搜索,而不是从包含预查的字符之后开始
(?<=pattern) 反向肯定预查,与正向肯定预查类拟,只是方向相反。例如,“(?<=95|98|NT|2000)Windows”能匹配“2000Windows”中的“Windows”,但不能匹配“3.1Windows”中的“Windows”。
(?<!pattern) 反向否定预查,与正向否定预查类拟,只是方向相反。例如“(?<!95|98|NT|2000)Windows”能匹配“3.1Windows”中的“Windows”,但不能匹配“2000Windows”中的“Windows”。
x|y 匹配x或y。例如,“z|food”能匹配“z”或“food”。“(z|f)ood”则匹配“zood”或“food”。
[xyz] 字符集合。匹配所包含的任意一个字符。例如,“[abc]”可以匹配“plain”中的“a”。
[^xyz] 负值字符集合。匹配未包含的任意字符。例如,“[^abc]”可以匹配“plain”中的“p”。
[a-z] 字符范围。匹配指定范围内的任意字符。例如,“[a-z]”可以匹配“a”到“z”范围内的任意小写字母字符。
[^a-z] 负值字符范围。匹配任何不在指定范围内的任意字符。例如,“[^a-z]”可以匹配任何不在“a”到“z”范围内的任意字符。
\b 匹配一个单词边界,也就是指单词和空格间的位置。例如,“er\b”可以匹配“never”中的“er”,但不能匹配“verb”中的“er”。
\B 匹配非单词边界。“er\B”能匹配“verb”中的“er”,但不能匹配“never”中的“er”。
\cx 匹配由x指明的控制字符。例如,\cM匹配一个Control-M或回车符。x的值必须为A-Z或a-z之一。否则,将c视为一个原义的“c”字符。
\d 匹配一个数字字符。等价于[0-9]。
\D 匹配一个非数字字符。等价于[^0-9]。
\f 匹配一个换页符。等价于\x0c和\cL。
\n 匹配一个换行符。等价于\x0a和\cJ。
\r 匹配一个回车符。等价于\x0d和\cM。
\s 匹配任何空白字符,包括空格、制表符、换页符等等。等价于[ \f\n\r\t\v]。
\S 匹配任何非空白字符。等价于[^ \f\n\r\t\v]。
\t 匹配一个制表符。等价于\x09和\cI。
\v 匹配一个垂直制表符。等价于\x0b和\cK。
\w 匹配包括下划线的任何单词字符。等价于“[A-Za-z0-9_]”。
\W 匹配任何非单词字符。等价于“[^A-Za-z0-9_]”。
\xn 匹配n,其中n为十六进制转义值。十六进制转义值必须为确定的两个数字长。例如,“\x41”匹配“A”。“\x041”则等价于“\x04&1”。正则表达式中可以使用ASCII编码。.
\num 匹配num,其中num是一个正整数。对所获取的匹配的引用。例如,“(.)\1”匹配两个连续的相同字符。
\n 标识一个八进制转义值或一个向后引用。如果\n之前至少n个获取的子表达式,则n为向后引用。否则,如果n为八进制数字(0-7),则n为一个八进制转义值。
\nm 标识一个八进制转义值或一个向后引用。如果\nm之前至少有nm个获得子表达式,则nm为向后引用。如果\nm之前至少有n个获取,则n为一个后跟文字m的向后引用。如果前面的条件都不满足,若nm均为八进制数字(0-7),则\nm将匹配八进制转义值nm
\nml 如果n为八进制数字(0-3),且m和l均为八进制数字(0-7),则匹配八进制转义值nml。
\un 匹配n,其中n是一个用四个十六进制数字表示的Unicode字符。例如,\u00A9匹配版权符号(©)。

CentOS6和CentOS7更高的内核 一键安装[lotServer] 锐速 Vicer

1.支持更高的Linux内核一键安装[lotServer] 锐速.
2.支持一键完全卸载[lotServer] 锐速 (此脚本安装的无残留).
3.不支持自动更换内核. CentOS6和CentOS7 一键更换内核,一键安装锐速[lotServer]
4.不支持OpenVZ.
所有内容均来自互联网.本人不负任何法律责任,仅供学习使用.
Update:2019.04.15

一键安装[lotServer] 锐速:
bash <(wget --no-check-certificate -qO- https://github.com/MoeClub/lotServer/raw/master/Install.sh) install

一键卸载[lotServer] 锐速:
bash <(wget --no-check-certificate -qO- https://github.com/MoeClub/lotServer/raw/master/Install.sh) uninstall

使用方法:
启动命令 /appex/bin/lotServer.sh start
停止加速 /appex/bin/lotServer.sh stop
状态查询 /appex/bin/lotServer.sh status
重新启动 /appex/bin/lotServer.sh restart

1.更新许可证(有效期为6个月)
wget -qO '/appex/etc/apx.lic' "https://api.moeclub.org/lotServer?ver=1&mac=00:00:00:00:00:00"
使用 ifconfig 查看网卡 mac 地址,替换 00:00:00:00:00:00 (当内核版本号小于等于 3.11.20.10 时, 请设置 ver=0)

2.使用KeyGen, 更新许可证(lic文件)(有效期到2099年)
git clone https://github.com/Tai7sy/LotServer_KeyGen
cd LotServer_KeyGen
php keygen.php 00:00:00:00:00:00 (使用 ifconfig 查看网卡 mac 地址,替换 00:00:00:00:00:00)
cp out.lic /appex/etc/apx.lic
状态查询 /appex/bin/lotServer.sh status

3.CentOS7启动自动运行lotServer
chmod +x /etc/rc.local
vi /etc/rc.local
添加su - root -c "/appex/bin/lotServer.sh start"

图为CentOS Linux release 7.5.1804 安装[lotServer] 锐速

使用 FRP 内网穿透| 适用于Linux Windows服务端

使用 FRP 内网穿透| 适用于Linux Windows服务端
1、很多情况下处于NAT网络环境中没有公网IP,这个时候可疑通过FRP服务器的转发进行内网穿透。frp内网穿透服务器搭建和frp使用方法。
本教程是使用TCP模式(连接内网Windows的远程桌面),frp客户端和frp服务端以Windows服务的方式在后台默默运行,还可以使用UDP、HTTP、HTTPS模式。
2、为什么不再使用ngork
ngork2.0不再开源

3、Linux服务端安装
wget --no-check-certificate https://raw.githubusercontent.com/clangcn/onekey-install-shell/master/frps/install-frps.sh -O ./install-frps.sh
chmod 700 ./install-frps.sh
./install-frps.sh install
或者手动安装
https://github.com/fatedier/frp/releases/download/v0.16.1/frp_0.16.1_linux_386.tar.gz
https://github.com/fatedier/frp/releases/download/v0.16.1/frp_0.16.1_linux_amd64.tar.gz
tar -zxvf frp_0.16.1_linux_amd64.tar.gz
mv frp_0.16.1_linux_amd64 frp
vi /etc/rc.local
su - root -c "/root/frp/frps -c /root/frp/frps.ini -L /root/frp/frps.log"

https://github.com/fatedier/frp/releases/download/v0.21.0/frp_0.21.0_linux_amd64.tar.gz
tar -zxvf frp_0.21.0_linux_amd64.tar.gz
mv frp_0.21.0_linux_amd64 frp
vi /etc/rc.local
su - root -c "/root/frp/frps -c /root/frp/frps.ini" #这样日志会在/root目录下

4、Windows服务端安装
https://github.com/fatedier/frp/releases
https://github.com/fatedier/frp/releases/download/v0.16.1/frp_0.16.1_windows_386.zip
https://github.com/fatedier/frp/releases/download/v0.16.1/frp_0.16.1_windows_amd64.zip
解压即可

5、frp服务端配置文件,基本包含frps_full.ini全部的配置了
frps.ini
---------------------------------------------------------------------------------------------------
[common]
bind_addr = 0.0.0.0
bind_port = 5443
# udp port used for kcp protocol, it can be same with 'bind_port'
# if not set, kcp is disabled in frps
kcp_bind_port = 5443

# set dashboard_addr and dashboard_port to view dashboard of frps
# dashboard_addr's default value is same with bind_addr
# dashboard is available only if dashboard_port is set
dashboard_addr = 0.0.0.0
dashboard_port = 7500

# dashboard user and pwd for basic auth protect, if not set, both default value is admin
dashboard_user = admin
dashboard_pwd = admin

# assets_dir = ./static
vhost_http_port = 8080
vhost_https_port = 4443
log_file = ./frps.log
# debug, info, warn, error
log_level = info
log_max_days = 30

# privilege mode is the only supported mode since v0.10.0
privilege_token = hLzzySjVo1kMJgaz
# heartbeat configure, it's not recommended to modify the default value
# the default value of heartbeat_timeout is 90
# heartbeat_timeout = 90

# only allow frpc to bind ports you list, if you set nothing, there won't be any limit
#privilege_allow_ports = 1-65535
# pool_count in each proxy will change to max_pool_count if they exceed the maximum value
max_pool_count = 50

# authentication_timeout means the timeout interval (seconds) when the frpc connects frps
# if authentication_timeout is zero, the time is not verified, default is 900s
authentication_timeout = 900

# if subdomain_host is not empty, you can set subdomain when type is http or https in frpc's configure file
# when subdomain is test, the host used by routing is test.frps.com
subdomain_host = frps.com

# if tcp stream multiplexing is used, default is true
tcp_mux = true

服务端简洁配置
[common]
bind_addr = 0.0.0.0
bind_port = 55443
kcp_bind_port = 55443
log_file = ./frps.log
log_level = info
log_max_days = 30
privilege_token = hLzzySjVo1kMJgaz
max_pool_count = 50
tcp_mux = true
authentication_timeout = 900
#frp_0.21会出现下面的错误,FRP 客户端所在机器和 FRP 服务端所在机器的时间相差不能超过 15 分钟
login to server failed: authorization faile
2018/09/27 14:31:15 [W] [service.go:262] authorization failed
-------------------
6、Windows 启动frp服务器
frps.exe -c frps.ini
Windows快速添加通过防火墙规则
netsh advfirewall firewall add rule name="Open Port 5443" dir=in action=allow protocol=TCP localport=5443
netsh advfirewall firewall add rule name="Open Port 5443" dir=in action=allow protocol=TCP localport=6443
netsh advfirewall firewall add rule name="Open Port 4443" dir=in action=allow protocol=TCP localport=4443
netsh advfirewall firewall add rule name="Open Port 23689" dir=in action=allow protocol=TCP localport=23689
netsh advfirewall firewall add rule name="Open Port 8080" dir=in action=allow protocol=TCP localport=8080

Windows 开机自启动frp服务器
控制面板 ---> 管理工具 ---> 任务计划程序

或者运行框输入下面代码,添加启动项 #这样必须登录系统才开始运行服务
%programdata%\Microsoft\Windows\Start Menu\Programs\Startup
-------------------
7、linux 启动frp服务器
frps -c frps.ini

Linux 开机自启动frp服务器
vi /etc/rc.d/rc.local #centos7 chmod +x /etc/rc.d/rc.local
su - root -c "/root/frp/frps -c /root/frp/frps.ini"

vi /etc/rc.local
su - root -c "/root/frp/frps -c /root/frp/frps.ini"
iptables -I INPUT -p tcp -m multiport --dports 55443,55446,55448 -j ACCEPT;service iptables save;service iptables restart
---------------------------------------------------------------------------------------------------
8、客户端配置文件tcp_model
frps.ini
----------
[common]
server_addr = 122.114.xx.xx
server_port = 5443
log_file = ./frpc.log
log_level = info
log_max_days = 30
privilege_token = hLzzySjVo1kMJgaz
pool_count = 50
tcp_mux = true
login_fail_exit = true
protocol = tcp
[tcp_mode]
privilege_mode = true
type = tcp
local_ip = 127.0.0.1
local_port = 3389
remote_port = 23689

验证登录远程桌面122.114.xx.xx:23689

[ssh]
# tcp | udp | http | https | stcp | xtcp, default is tcp
type = tcp
local_ip = 127.0.0.1
local_port = 22
# true or false, if true, messages between frps and frpc will be encrypted, default is false
use_encryption = false
# if true, message will be compressed
use_compression = false
# remote port listen by frps
remote_port = 6001
# frps will load balancing connections for proxies in same group
group = test_group
# group should have same group key
group_key = 123456
--------------
9、客户端配置文件http_model
[common]
server_addr = 122.114.xx.xx
server_port = 5443
log_file = ./frpc.log
log_level = info
log_max_days = 30
privilege_token = hLzzySjVo1kMJgaz
pool_count = 50
tcp_mux = true
login_fail_exit = true
protocol = http
[web]
type = http
local_ip = 127.0.0.1
local_port = 80
use_encryption = false
use_compression = false
subdomain = frp.asuhu.com
-------------------
启动客户端
frpc.exe -c frpc.ini